DIY natural homemade face cleanser for a soft and glowing skin (almost) effortlessly
For my first article since I decided to bring back « The Secret Diary » I chose to highlight one of my favourite hobbies : homemade cosmetics and one of my most beloved beauty ingredient, chickpea flour.
Even though I don’t make DIY’s as much as I used to years ago, if there’s an effective and gentle ingredient that I always go back to when my skin is sensitive or irritated, it’s definitely this one.
Chickpea or gram flour is well known in Indian cuisine as well as some protein rich bread recipes.
But it’s also a very important beauty ingredient in Ayurveda where it is used as gentle cleanser for hair and skin thanks to it’s high saponin concentration.
Moreover, gram flour is rich in antioxydants, magnesium and zinc, which give it anti aging properties. Magnesium helps reduce the appearance of wrinkles and enhance skin elasticity, smooth fine lines and prevent early aging. It’s high minerals content contribute to reduce acne and imperfections, even skin tone and makes the skin glow.
Additionally, it’s antioxydant and anti-inflammatory properties can help in regulating the skin pH as well as sebum production.
And the list goes on ! Last but not least, chickpea flour is very affordable, so not only will you benefit from it’s amazing properties for your health and skin but you will also save some money.
For a quick and easy face cleanser, you can just put about half a teaspoon in your hand and add a few drops of water to make a paste, not too watery but not too crumbly either. Apply this paste on your face and rub it gentle onto your skin to clean it like you would do with any other face cleanser, then rince it of with water and feel how your skin is soft and not tight anymore.
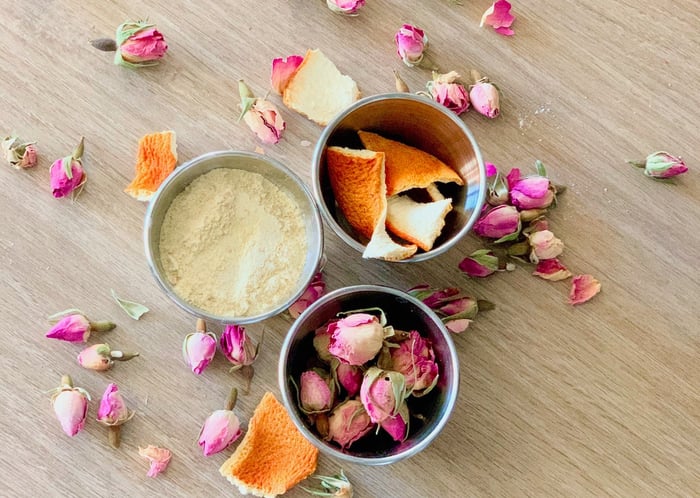
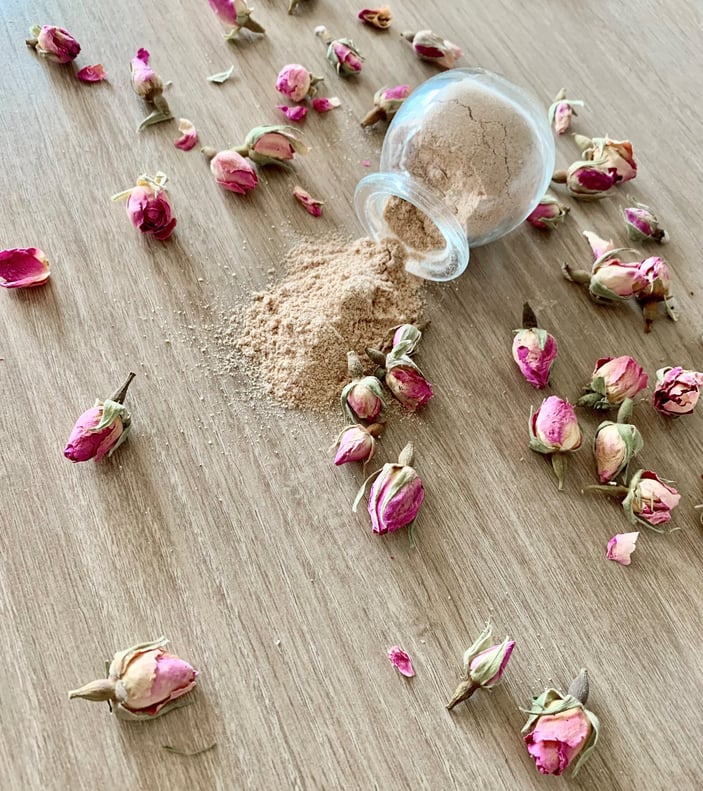
Face wash, mask or shampoo (or no-poo), you can use chickpea flour to suit your needs. I chose to combine it with orange peel powder and rose powder for it’s anti-aging and antibacterial benefits.
Retrouvez la recette pas à pas sur ma chaîne Youtube @GentleBeautywithAliza. Ces recettes font partie d'une série de videos qui s'appelle "My Secret Beauty Diary" et publiées sous forme d'épisodes. Ce DIY en est le premier épisode. La qualité de la video n'est pas au top, j'ai passé plus de dix jours à essayer de la mettre en ligne et j'ai dû modifier son format pour qu'elle soit en HD je ne sais combien de fois sans succès, bref une vraie galère, mais elle est enfin en ligne, le prochain épisode sera, je l'espère, en HD et moins frustrant à charger 🤞🏽.
Dites moi ce que vous avez pensé de la recette en commentaire et on se retrouve la semaine prochaine pour un nouveau DIY !
You can find the step by step recipe on my Youtube channel @GentleBeautywithAliza. These recipes are part of a series called « My Secret Beauty Diary » and are published in the form of episodes. This DIY is the first episode. I apologise already for the quality of the video. It’s my first Youtube video, and it took me more than ten days to try to put it online, not only it took forever to load every time I tried but it wouldn’t load it in HD quality. I did my best this time, but the next video should be in HD and less frustrating to load 🤞🏽.
Let me know your thought on this recipe in the comments.
See you next time !